The room program
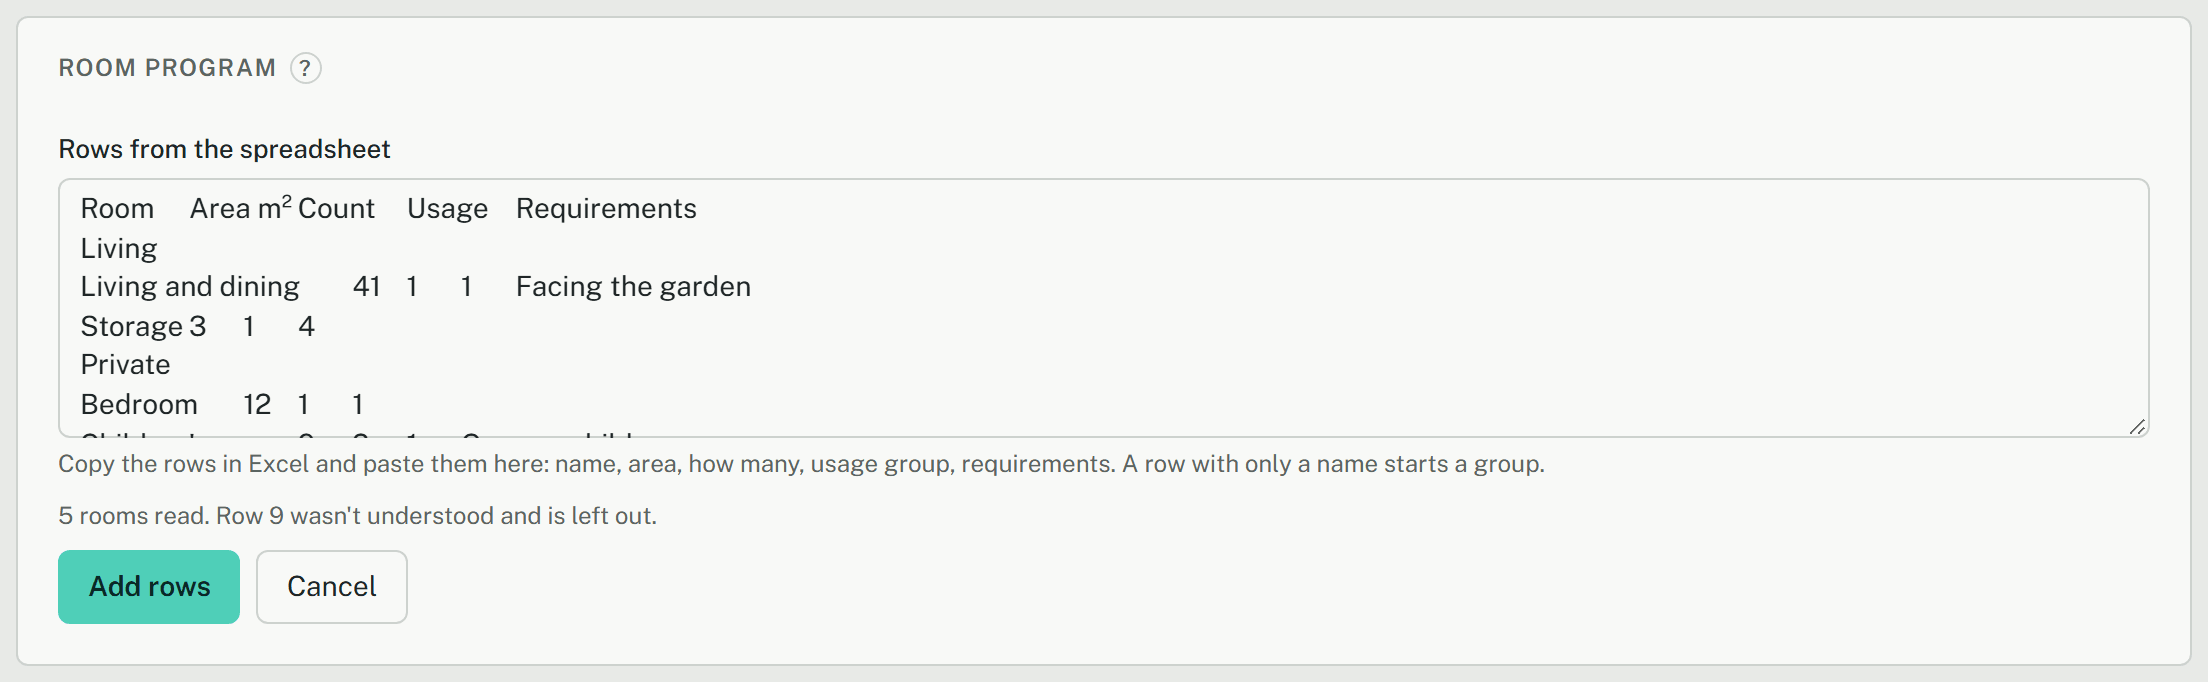
The room program holds the rooms the client needs, with their target areas, per building. The project overview sets it beside what the models have drawn: for each line, the rooms linked to it, their area and whether they meet the target. Nothing is matched by name: you link each drawn room to its line yourself.
Entering the program
- Open the project's overview. The Room program card is there; with more than one building, pick the building at its top. Everyone in the project reads it; editors and the project's lead change it.
- Add room takes one line: Name, Target area, How many, Usage (DIN 277), Group and Tolerance (5 % until you change it), and Requirements as free text.
- Or Paste from a spreadsheet…: copy the rows in Excel or another spreadsheet and paste them under Rows from the spreadsheet. The columns are name, area, how many, usage group, requirements; only name and area are needed.
- The card says how many rooms it read and which rows it didn't understand; Add rows takes them over. Each line can be changed with Edit or removed with Delete afterwards.
Linking drawn rooms
- Draw the walls and place the rooms with the Room tool as usual.
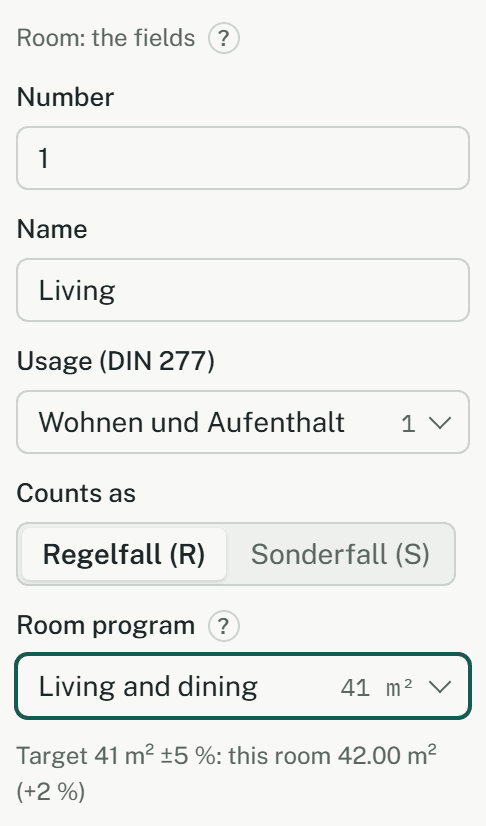
- Select a room. In its properties, Room program lists the building's lines, by group, with their target area. Pick the line the room is for; Not in the program takes it out again.
- Under the field the room's area is compared with the line's target and tolerance, highlighted when it lies outside. Several rooms selected together are linked in one step.
Reading the card
The card adds up the target and the drawn area, and counts the lines met. Each line shows its target (with how many and the tolerance), what is drawn (how many, their area together and the difference in %) and its state:
- Met: as many rooms as asked, each within the tolerance of the target.
- Not drawn: no room is linked yet.
- Too few or Too many: another number of rooms than the line asks for.
- Area off: the number fits, but a room's area lies outside the tolerance, or it has no area yet because its walls don't enclose it.
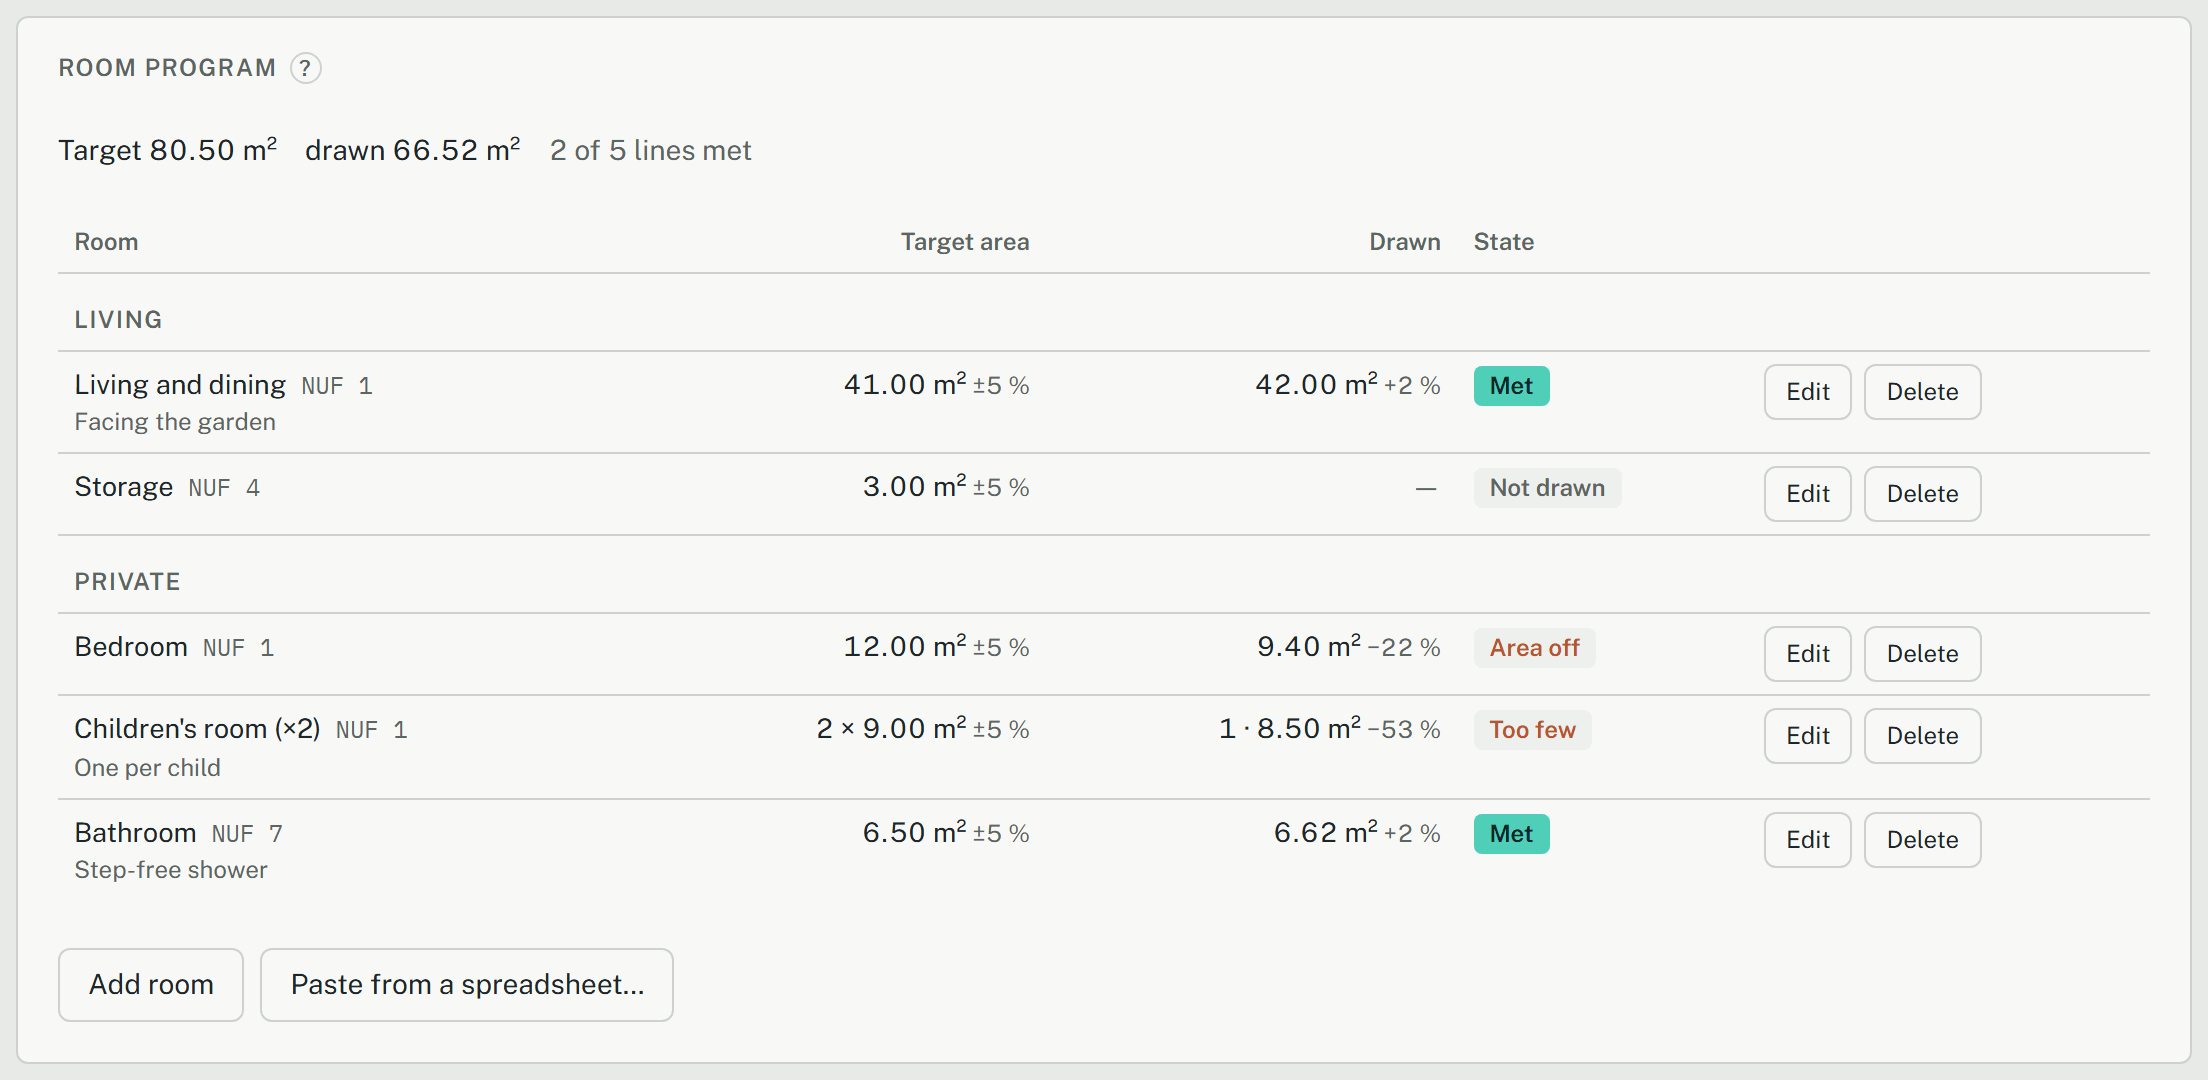
- Each room is held to the line's target on its own: two children's rooms of 12 m² each need two rooms of about 12 m², not 24 m² together.
- The card reads every model's main branch as it is now. A variant on a branch of its own counts once it is merged.
- Drawn rooms linked to no line are named under the table, so none is forgotten.
At the gate and in a release
- When LPH 2 or 3 is closed and the project has a room program, the gate dialog checks Every room of the room program is drawn, within its tolerance. An open check asks for a reservation, like the others.
- Every release keeps the program as it stood, with what was drawn of each line, and the release list says Room program: n of m lines met. The release keeps totals per line, so there a line counts as met when its rooms are all drawn and their area together lies within the tolerance.