Dimensions and notes
Dimensions and notes are drawn into the plan like lines, on layers of their own, and print as they are on screen. Both stay where you put them: they don't follow the model when walls move later.
Drawing a dimension chain
- Start Dimension (DIM).
- Click the first point to measure, such as a wall corner or a jamb. Points snap to wall ends, corners and jambs, or type one as x,y.
- Click the second point.
- Click where the dimension line goes, or type its distance from the points as a plain number. Beside the points the line runs vertically, above or below them horizontally.
- Click further points to extend the chain. Each one adds a measurement and is one undo step.
- Enter or Esc ends the chain. The tool stays on for the next one; a second Enter or Esc leaves it.
A chain is one element: it is selected, moved and deleted as one. Its grips move each measured point and the dimension line.
- Direction on the command line is "Horizontal or vertical" (by the pointer, as above) or "Along the points", for a wall at an angle.
- Where the line goes, a plain number is a distance from the points, on the side of the pointer; anything with a comma, like 2000,-500, is a coordinate.
- Dimensions go on the general dimension layer (------/D- in the office's layer standard), else on the active layer.
How the numbers are written
The numbers follow DIN 1356-1, in every language:
- Below 1 m in centimetres: 88, 24.
- From 1 m in metres with a decimal comma: 3,76, 5,00.
- Millimetres are raised: 88⁵ is 885 mm, 2,11⁵ is 2.115 m.
- The ticks are oblique, and the numbers read from the bottom or the right.
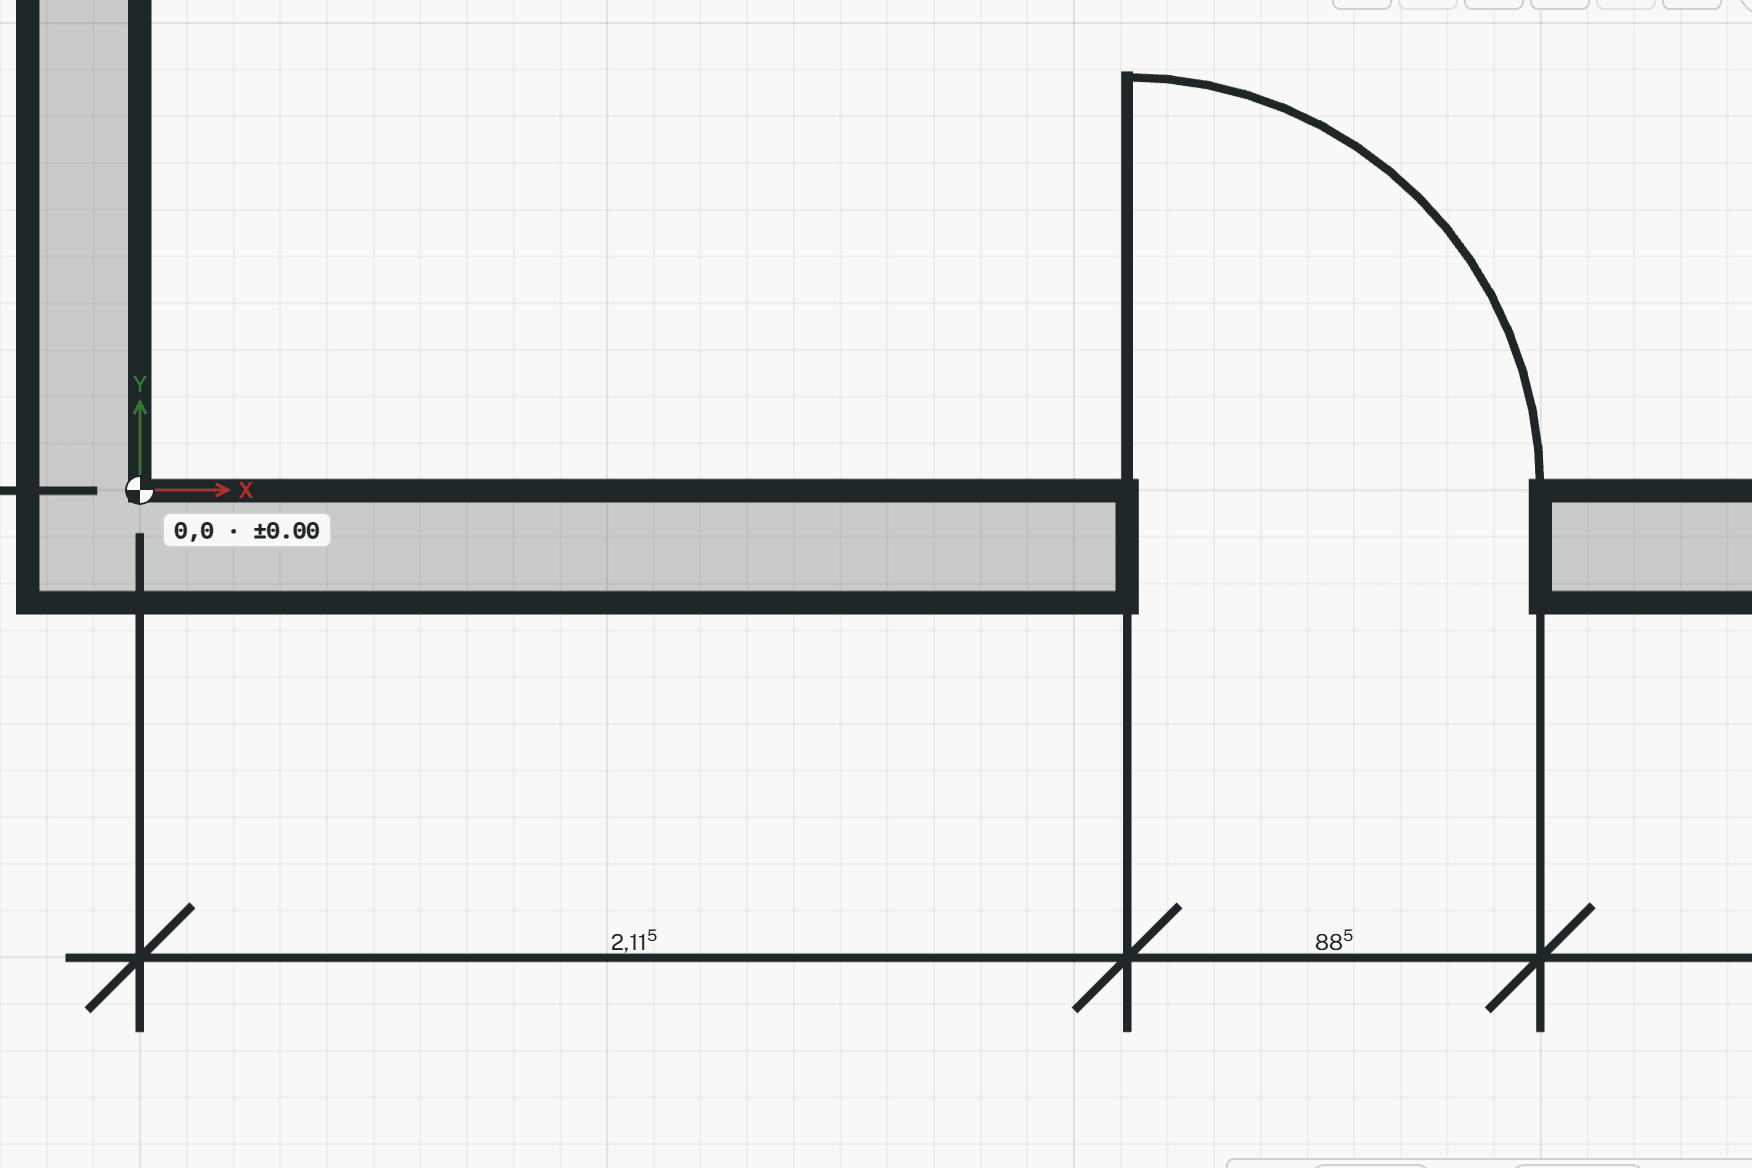
Where a number has no room, neighbours take turns on a second row. On screen, a part shorter than 8 pixels shows no number until you zoom in; the PDF writes the numbers at the print's scale.
Dimensions don't follow the model
A dimension measures its own points, not the walls. When you move a wall, its dimensions stay where they were and still show the old numbers, with no sign that they are out of date. After changing walls, check the dimensions near them: drag a dimension's grips to the new points, or delete it and draw it again.
Writing a note
- Start Text (T) and click where the text goes, or type the point as x,y. The point is the top of the text, on the side it is aligned to.
- Write in the field that opens there. Enter starts a new line.
- Ctrl+Enter or a click elsewhere finishes the note; Esc drops it. Each note is one undo step, and the tool stays on for the next one.
For a note that points at something, start Leader note (LE):
- Click what the leader points at. Object snap works for the tip.
- Click where the text goes, or type it relative to the tip as @dx,dy.
- Write the text and finish with Ctrl+Enter. Text and leader are one element, with an open arrow at the tip.
Changing a note
- Double-click a note with Select to write in it again.
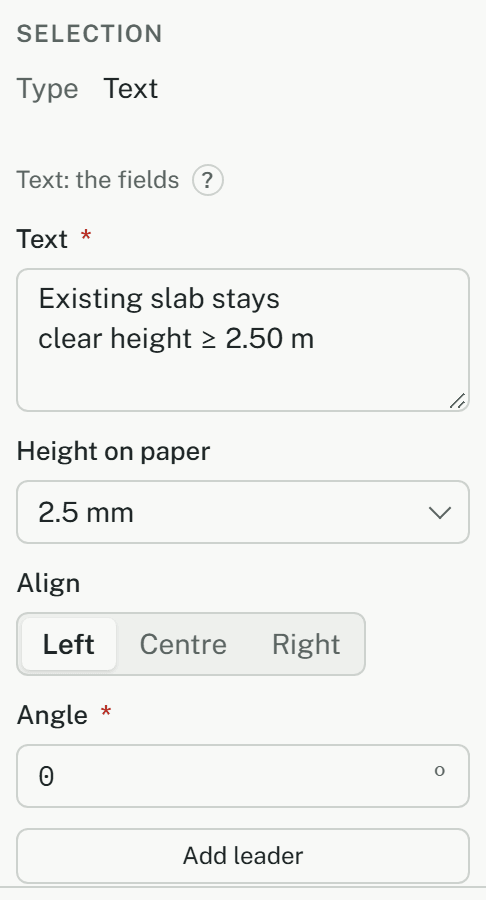
- Select it to change it under Selection: Text, Height on paper, Align, Angle, and Add leader or Remove leader. A new leader starts beside the text; drag the grip at its tip to what it should point at.
- Moving the text keeps the tip where it is, and a moved wall leaves the tip behind, as with dimensions.
Size and layer
- Height on paper is the height of capitals on the printed sheet: 2.5, 3.5, 5 or 7 mm, 2.5 mm to start with. So a note keeps its size on paper at any scale, and its box in the plan grows or shrinks with the scale.
- Notes go on the Explanations layer (------/V-), apart from the room stamps. Hide that layer and all notes go at once; in the print dialog, leave it out under All layers beside a storey. A model without the layer gets it with its first note. The Layer option picks another for the session.
- A note's text is shown and printed exactly as written. It is never translated, whatever the language of the screen.
Printing
- Dimensions and notes print in black like the rest of the plan, at their size on paper.
- Notes count for the fit: a note that would be cut off makes the print refuse that scale, like a plan that doesn't fit. Move the note or choose a smaller scale.
- The PDF's font has only Western European characters. Others, such as ≥, Δ, or Polish, Czech, Turkish, Greek or Cyrillic letters, would print as ?. The print dialog names them before you print; the model keeps them as written.

Limits
- Dimensions aren't associative, and neither are leaders (see above).
- One point can't be taken out of a chain; draw the chain again.
- Dimensions and notes aren't snapped to, and don't show in 3D.
- A note has one straight leader with an arrow; no bends, no dot, no automatic wrapping, no bold or underline.
- Mirroring moves a note but never mirrors its letters.