Typing coordinates and snapping
Every point a tool asks for can be clicked or typed. Typed points are exact to the millimetre, and snapping makes a click just as exact by catching the corners and edges already drawn.
Typing a point
- Just type: letters and numbers go to the command line at the bottom, and Enter takes them. The prompt beside it says what the tool wants next.
- Values are millimetres, and angles are degrees counter-clockwise from the X axis: 0 points right, 90 up, 180 left, 270 down.
- A point can be written five ways:
- 2500,1000: x 2500, y 1000, counted from the zero point 0,0.
- @3000,0: 3000 to the right of the last point. With @ a point counts from the last point.
- @3000<90: 3000 from the last point at 90°, straight up.
- 3000<45: 3000 from the zero point at 45°. Without @, a length with an angle counts from 0,0, not from the last point.
- 3000: a bare length, 3000 from the last point towards the pointer. Point the way you want, with Ortho on for a straight line, and type the length.

Example: four walls typed
- W and Enter starts the wall tool.
- 0,0 and Enter puts the first corner on the zero point.
- @6000<90, @8000<0 and @6000<270, each with Enter, draw three walls, one step each.
- C and Enter closes the outline back to the first corner.
Decimals and the decimal comma
- A decimal point always works: 1250.5,0.
- A German decimal comma needs a semicolon between the two coordinates, because the comma would otherwise separate them: 2,5;1000 is x 2.5, y 1000.
- In a length with an angle a comma works too: @1250,5<90.
- A bare length with a comma reads as a point: 1250,5 is x 1250, y 5. Type 1250.5 instead.
Units and arithmetic in fields
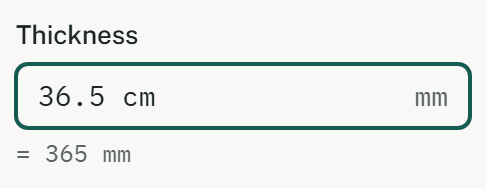
The command line counts in millimetres only. Number fields, such as the tool options beside the prompt, the inspector and the settings, take more:
- a unit: 36,5 cm or 0.365 m in a field that counts in mm,
- arithmetic: 2750+240, (500-20)/2, 3*1250,
- a decimal comma or a decimal point.
While the text isn't a plain number, the result shows by the field. Enter or leaving the field takes it; Esc gives back the value it had.
Snapping
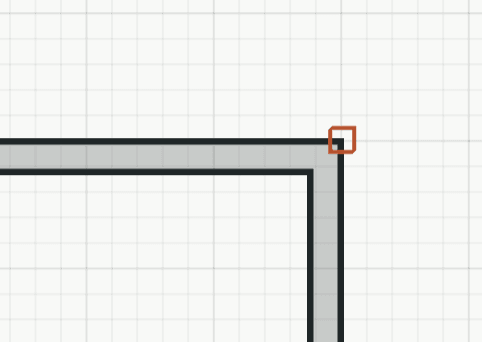
With Snap on (F3), a click near something drawn lands exactly on it. A marker on the plan shows the point, and the pointer position in the status bar names it: endpoint, intersection, midpoint, centre, perpendicular or nearest.
- The point nearest the pointer wins, within about 10 pixels on screen. When two are equally near, an endpoint comes first, then intersection, midpoint, centre and perpendicular.
- Perpendicular needs a last point: it offers the foot of the perpendicular from there.
- Nearest, any point on an element, answers only when nothing else is in reach, and gives way to Ortho and Grid snap.
- Walls snap as the plan draws them: their faces and reference lines, with the corners where they join.
- Dimensions are never snapped to.
- Lines found in a picture underlay snap too, while its layer is the active one. Their marker is blue instead of orange: such a point is only as good as the scan.

Ortho, the grid and the keys
- F3 Snap: object snap on or off.
- F8 Ortho: from the last point only horizontal or vertical. Hold Shift to have it the other way for as long as you hold it. Snap comes before Ortho: a corner in reach is still caught.
- F7 Grid: shows or hides the grid.
- F9 Grid snap: rounds every point to the grid step. With Ortho on, only the free coordinate is rounded, so the point stays on the line.
- Grid step in the status bar: Auto follows the zoom in steps of 1, 2 and 5; a fixed step from 100 to 1250 mm, among them the octametric 125, 250, 625 and 1250 mm, stays at any zoom.
- The four switches are in the status bar too.
- Enter on an empty command line, or a right click, ends a step, such as a chain of walls. Esc clears what you typed, and pressed again it steps back.
In a coordinate system of your own
With a Coordinate system (UCS) in use, typed points count from its origin and along its axes, angles from its X axis, and Ortho, the grid and the pointer position follow it; the status bar puts its name before the coordinates. UCSW goes back to the model's axes. Snapping stays on what is drawn.