Walls, doors and windows
Walls are the backbone of the model: rooms take their areas from them, slabs and roofs can be made from them, and doors and windows sit in them. This page shows how to draw them, how they join, and how to change them afterwards.
Drawing walls
- Start Wall (W). Before clicking, set Thickness, On the reference line, External and Load-bearing on the command line. They stay for the session. A new wall is 240 mm thick, internal and load-bearing, and as high as the storey.
- Click the start point, or type it, e.g. 0,0.
- Click the next point, or type a length or @dx,dy. Each segment is a wall of its own and one undo step, joined to the one before at the corner.
- Type C to close back to the start, or press Enter or Esc to end the chain.
Which side the wall lies on
The line you draw is a face of the wall, not its middle: by default the Left face, so the body lies to the right of the way drawn. The arrow in the preview points from the line into the body.
- Draw clockwise round an outline, such as a slab's edge or a scan, and the walls lie inside it, with the line on the outer face.
- F flips the side for the next walls, while a face is on the line.
- Centre puts the middle of the wall on the line, as for an inner wall between two rooms. Then there is no side to flip.
How walls join
- Walls whose ends meet within 1 mm join at a corner: their faces are mitred, or squared off where the mitre would be very long.
- A wall ending inside another wall's body makes a T-join: it stops at the facing face, which opens for it. So draw an inner wall to a point inside the outer wall, not to its face.
- Walls only join where their heights overlap. Walls crossing each other in their middles aren't cleaned up yet: draw them as walls that end at the crossing instead.
- Rooms take their outline from the joined faces, so a gap in a join leaves a room "not enclosed" (see Rooms and areas to DIN 277).
Changing walls in the properties
Select one or more walls with Select and change them under Selection. Each change is one undo step; with several walls selected, a field whose values differ says "mixed", and a value typed there goes to all of them.
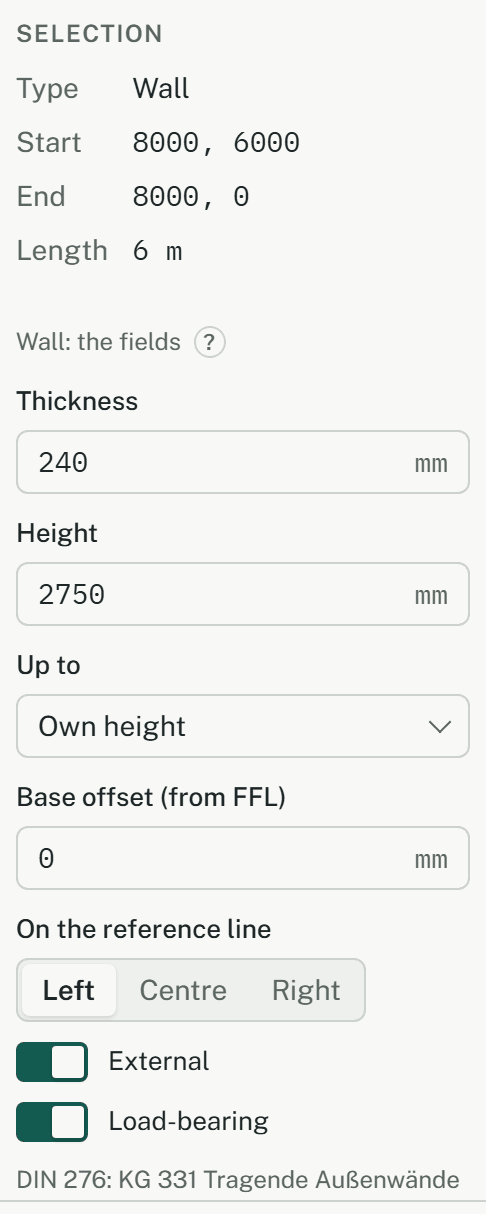
- Thickness and Height are the wall's size; Base offset (from FFL) raises or lowers its bottom.
- On the reference line (Left, Centre, Right) keeps the line where it is and moves the wall sideways.
- External and Load-bearing set the DIN 276 cost group shown below them: 331 load-bearing external, 332 non-load-bearing external, 341 load-bearing internal, 342 non-load-bearing internal. A wall on the layer of its old cost group moves to the layer of the new one, and its doors and windows follow between 334 and 344.
- Up to appears when there is a level above the wall or a roof over it. Pick a level and the wall takes its height from it and follows it when the level changes; Top offset (from that FFL) stops it above or below that floor, negative to end under a slab. Pick a roof and the wall runs up to its underside, a gable wall to its peak. Own height, or a typed height, lets go again. More in Split levels and Pitched roofs.
Changing walls by their grips
A selected wall shows grips: squares at its ends, a diamond at its middle. Drag one, or click it and then click or type the new place.
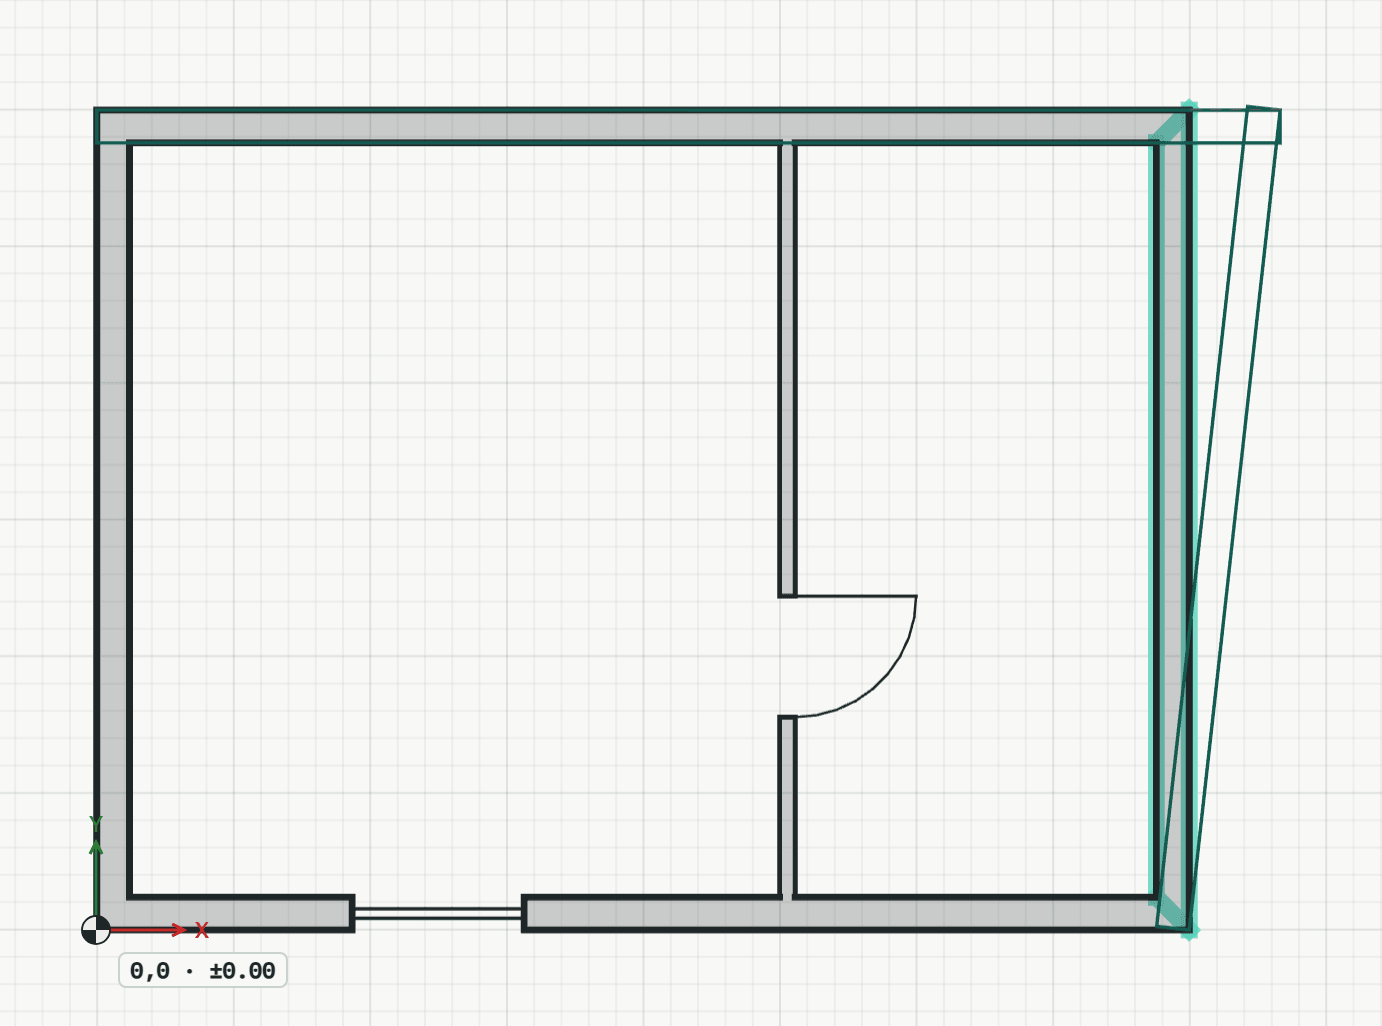
- An end grip moves every wall ending at that point, so corners stay closed and rooms keep their walls. Ortho (F8) then counts from the wall's other end, so the wall becomes level or plumb.
- Hold Ctrl (Cmd on a Mac) while dragging, or tick Detach, to move this wall alone: a wall snapped to a corner by mistake comes off it.
- The middle grip moves the wall sideways only; walls joined to it stretch along their own lines.
- A wall can't be shortened past one of its doors or windows, or made zero long. A joined wall on a locked layer refuses the move.
Doors and windows
- Start Door (D) or Window (WI). Set Width and Height, and for a window Sill, on the command line first.
- Click the wall where the opening goes: it is centred there. For a door, the side of the wall the pointer is on sets the side it opens to.
- Or point at the wall and type a distance in mm: the opening's near edge lands that far from the nearer wall end.
- The tool stays on for the next one; Enter or Esc ends it.
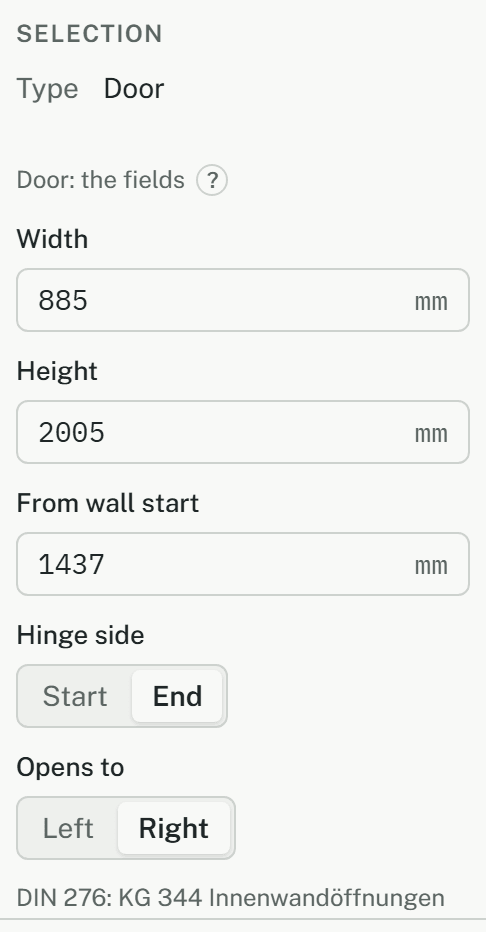
- A door starts at 885 × 2005 mm, a window at 1260 × 1385 mm with a 900 mm sill. These are structural openings (Rohbaumaß). The sill counts from the finished floor of the window's level.
- Check Hinge side in the door's properties and pick Start or End there: the click doesn't reliably set it. Opens to flips the swing to the other side of the wall.
- From wall start slides one opening along its wall. In the plan its grips slide it too, or move one jamb (at least 100 mm wide).
- An opening belongs to its wall: it moves, copies and goes with it. Too wide for the wall, or over another door or window, it is refused.
- The fields in the properties don't check whether an opening still fits or overlaps another one, so look at the plan after a change.
Limits
- Walls are straight. Curved walls and layered wall types aren't built yet; a build-up can be drawn beside a wall (tool Build-up).
- In 3D a door shows its frame lining the hole, without a leaf, so you can look through from room to room.
- The default sizes come from DIN 18100 and DIN 4172 and are still marked to verify against the standards.